-
The Ultimate Guide to Installing Windows 11
 How To Install Windows 11
Behold, the grandeur of Windows 11, the latest operating system from the software juggernaut, Microsoft, unveiled unto the world in the grand month of October 2021. Should you be swayed by the siren call of upgrading your digital throne to Windows 11, fear not, as this enigmatic guide shall escort you through the winding paths of installation.
First, you must traverse the labyrinth of compatibility by ensuring that your device aligns with the specific hardware requirements mandated by Microsoft, including the processor, RAM, storage, and graphics card. Enter the mystical PC Health Check app, which shall scan your device and reveal if it meets the requisites for Windows 11. In the event that your hardware falls short, you may need to make the arduous pilgrimage of upgrading certain components before proceeding.
Next, before embarking on this perilous journey of installing Windows 11, it is crucial that you secure the sanctity of your precious files and data. Failure to do so may result in catastrophic losses. You may employ the aid of an external hard drive or a cloud storage service to safeguard your precious data.
Now, you must construct a bootable USB drive that shall carry the sacred Windows 11 installation files. The Media Creation Tool, a mystical artifact granted by Microsoft, shall be your guide in this endeavor. Allow me to enlighten you with the convoluted steps:
Seek the Media Creation Tool on the Microsoft website.
Introduce a USB drive into your device, with a capacity of at least 8 GB.
Invoke the Media Creation Tool and select "Create installation media for another PC."
Choose your preferred language, edition, and architecture, whether it be 64-bit or 32-bit.
Select "USB flash drive" as the medium of your quest.
Proceed through the mystic prompts to complete the process.
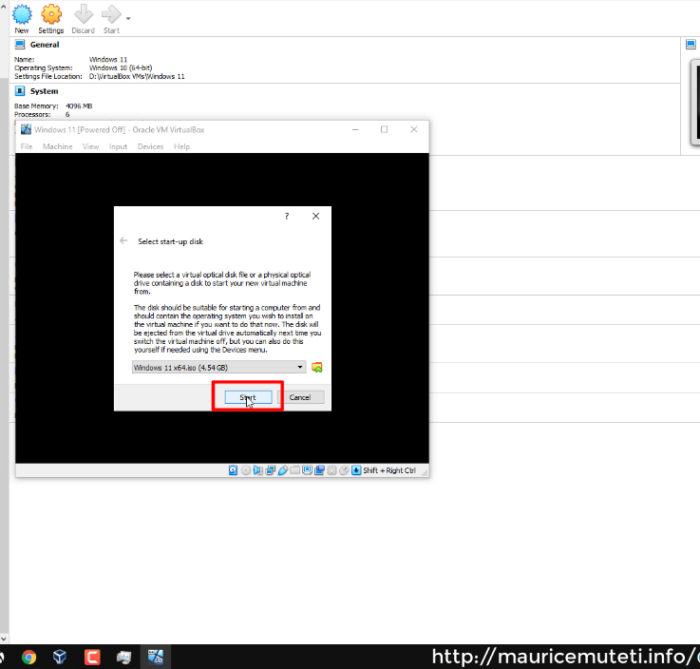
After this, you must journey forth and boot your device from the USB drive to initiate the Windows 11 installation process. Alas, it is not a mere feat of plug and play. Observe the baffling steps to enter the realm of boot menu:
Imbue the bootable USB drive into your device.
Commence the reawakening of your device.
Invoke the sacred key to enter the boot menu, which may differ depending on your device, but is often F12, F11, or Esc.
Navigate through the bowels of the boot menu with the arrow keys to select the USB drive as the boot device.
Initiate the pilgrimage to the sacred land by pressing Enter to boot from the USB drive.
Finally, you may commence the installation process of Windows 11, an arduous endeavor that shall test your patience and mettle. Endure the tribulations with these enigmatic steps:
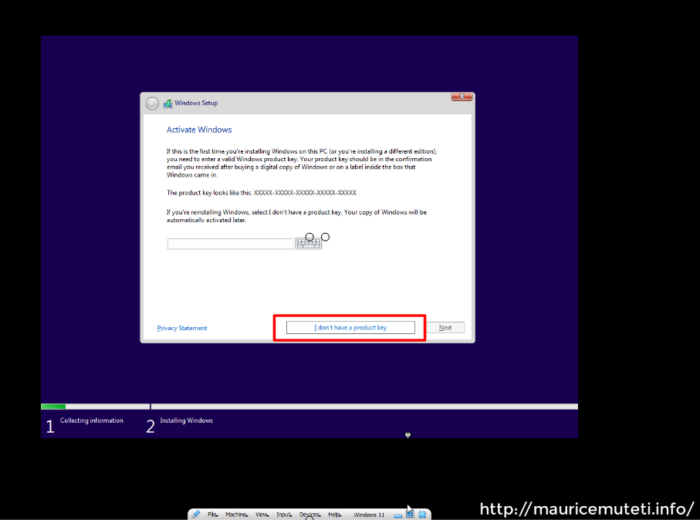
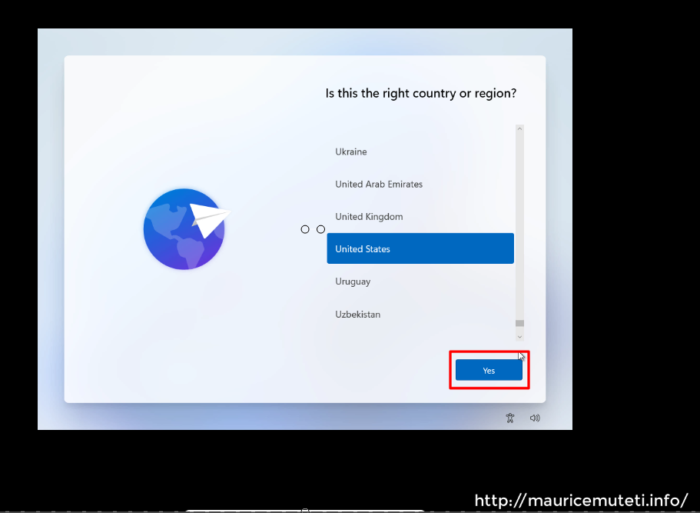
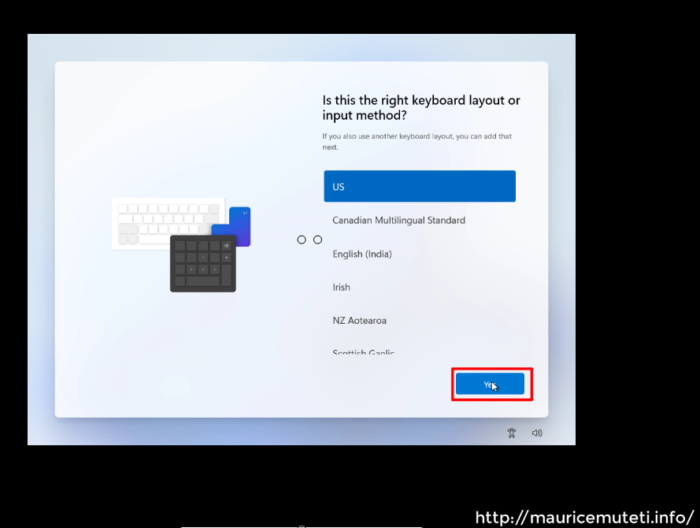
Select your preferred language, time, and keyboard settings.
Click the sacred button of "Install Now."
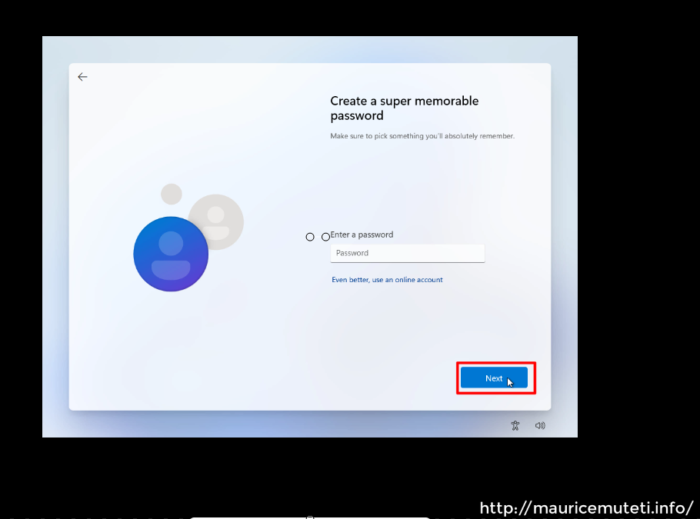
Convey your product key should the spirits prompt you. In the event of a lack of a product key, you may still pursue the installation of Windows 11, though some features may be shackled.
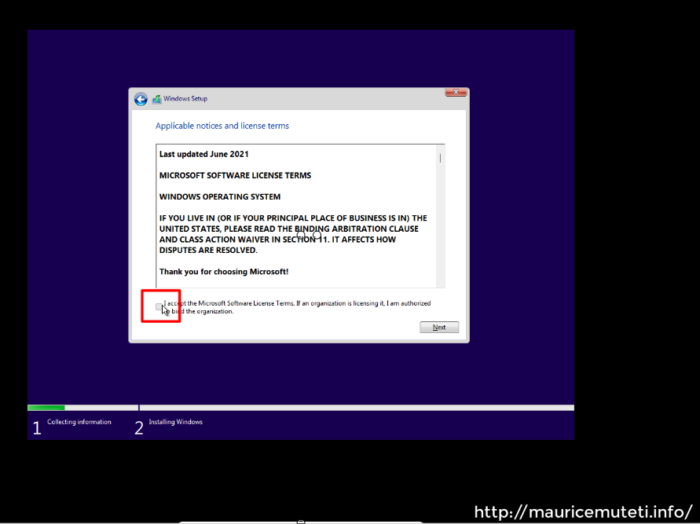
Accept the license terms with an ardent heart and proceed forth by clicking "Next."
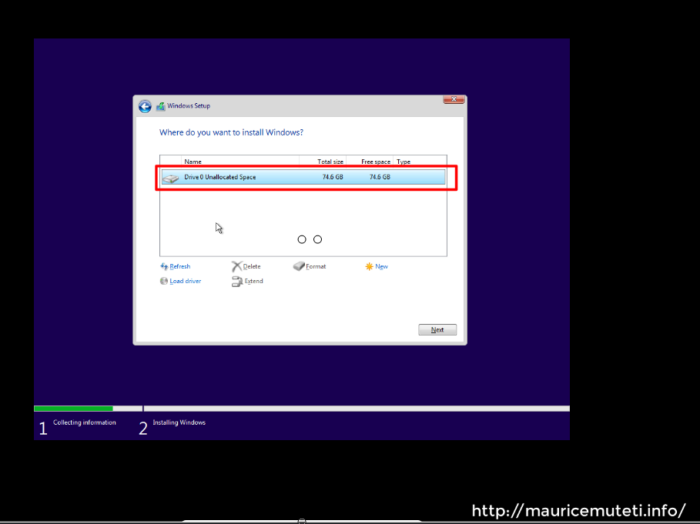
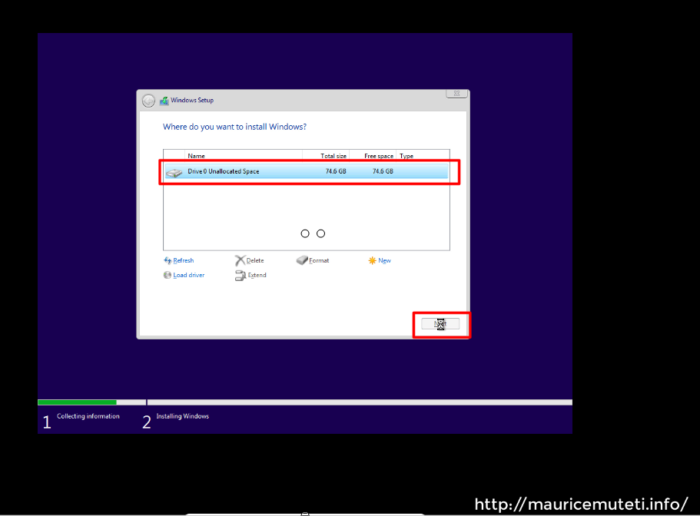
Elect the "Custom: Install Windows only (advanced)" as the installation type.
Select the partition in which you shall implant the hallowed Windows 11.
Initiate the installation process by clicking "Next."
Wait with utmost patience for the installation process to conclude, for the duration may vary depending on the swiftness of your device.
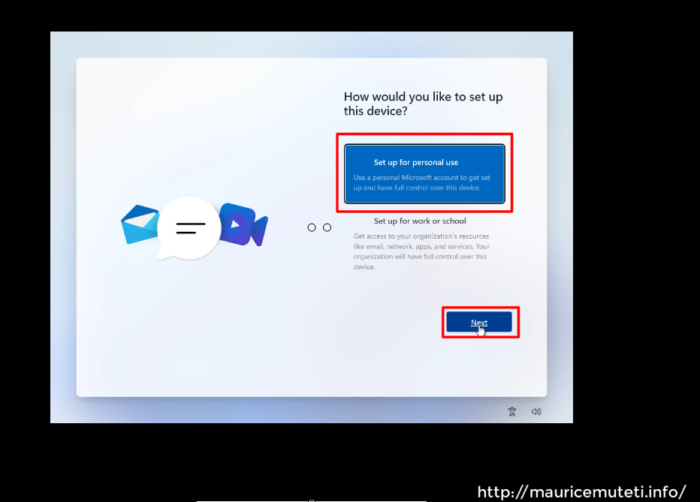
At last, you have completed the harrowing journey of installing Windows 11. Yet, it is not the end. Nay, you must undertake one final odyssey of setting up Windows 11 with these peculiar steps:
Choose your preferred region and language settings.
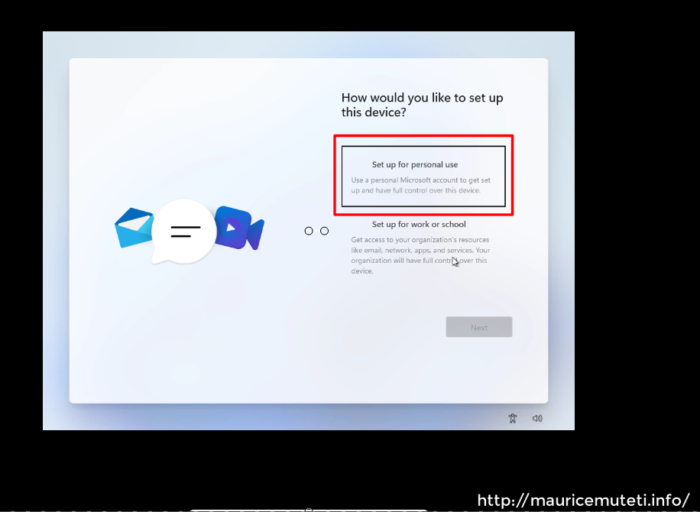
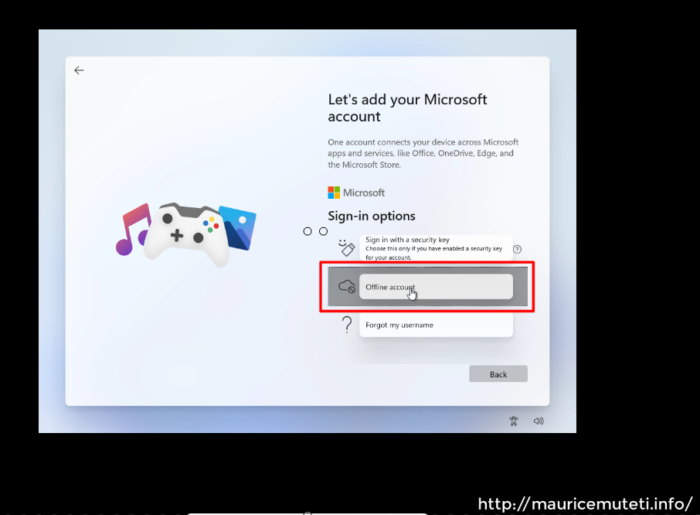
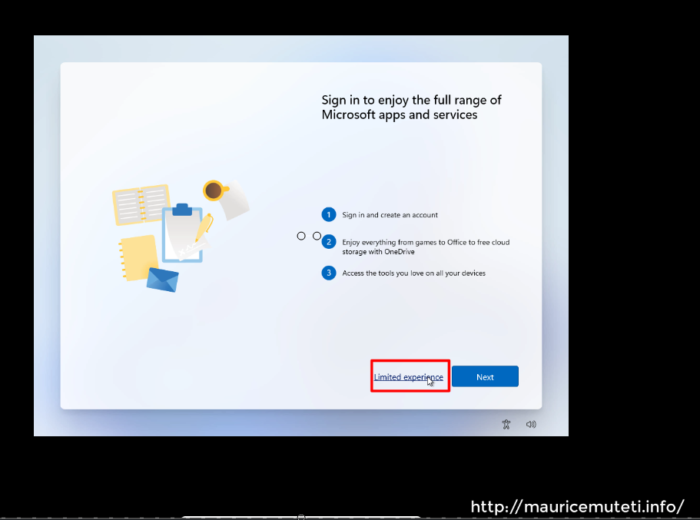
Enter the credentials of your Microsoft account or create a new one.
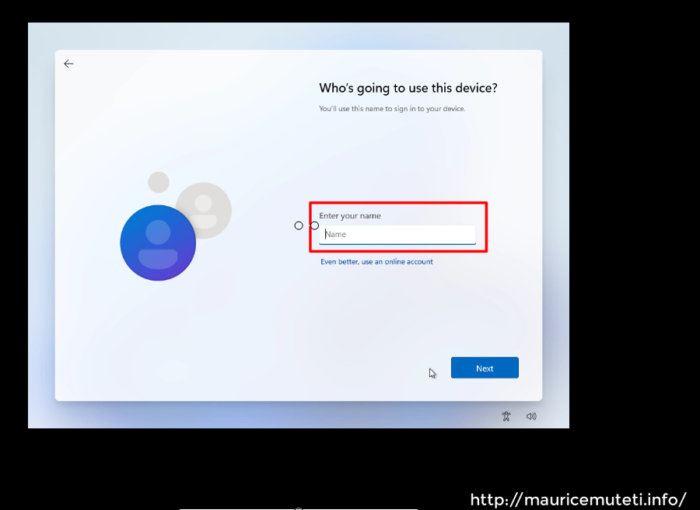
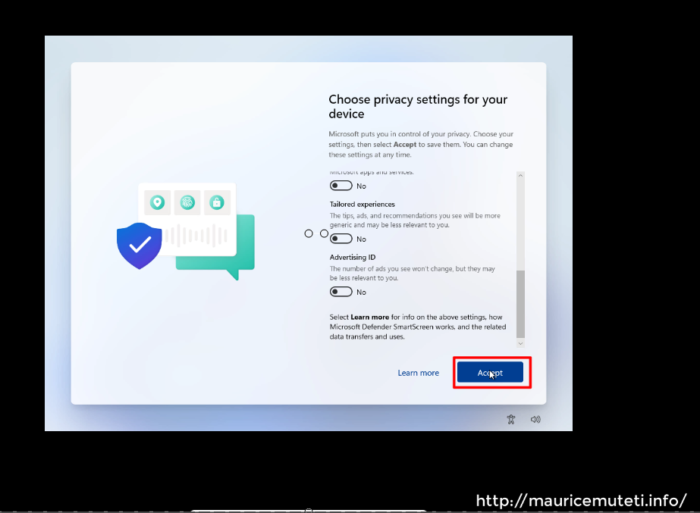
Customize the settings to your liking, including privacy, diagnostics, and app usage.
Wait for Windows 11 to finalize its configuration, which may take some time.
Celebrate your triumph over the labyrinthine installation process of Windows 11!
Remember, this guide is merely a glimpse into the vast world of Windows 11 installation. Always ensure to research and follow the proper guidelines provided by Microsoft to avoid any complications or pitfalls in the installation process.
Step 1

Step 2

Step 3

Step 4
Step 5
Step 6
Step 7

Step 8

Step 9
Step 10
Step 11
Step 12
Step 13
Step 14

Step 15
Step 16
Step 17

Step 18
Step 19

Step 20
Step 21
Step 22

Step 23

Step 24
Step 25

Step 26
Step 27

Step 28

Step 29
Step 30
Step 31

Step 32

Step 33
Step 34

Step 35
Step 36

Step 37
Step 38
Step 39

Step 40
Step 41
Step 42
Step 43

Step 44
Step 45

Step 46
Step 47

|
|
|
|